Ultimate Review on the Fluentalk T1 Mini Language Translator

Ultimate Review on the Fluentalk T1 Mini Language Translator

As a frequent traveler, communication can sometimes become a real problem, especially when visiting countries without knowing their local language. It can be frustrating and stressful when you’re unable to communicate effectively with people around you. That’s where the Timekettle Fluentalk T1 Mini Handheld Translator Device comes in. With this small yet powerful device, you can easily translate languages and break down the communication barrier. In this blog post, I’ll share my experience with the Timekettle Fluentalk T1 Mini Translator Device.

Who is Timekettle as a company

Timekettle is a global company that is revolutionizing the translation device industry. The headquarters is located in Shenzhen, China, and has an operations and customer center in Los Angeles, United States. This allows them to provide fast and reliable customer service to people around the world.

Since 2016, Timekettle has launched five innovative products for people worldwide. They first introduced the WT2 Plus, before releasing the WT2 Edge, followed by the M2 earbuds, M3 earbuds, the T1, and now the T1 mini handheld device.

Today, Timekettle is the leading brand in the translation device industry, whose brand is recognized globally. Timekettle’s goal is to simplify language barriers with its instant translation solutions for travelers. Say goodbye to communication challenges and make low-frequency conversations effortless.

T1 Mini Tanslator

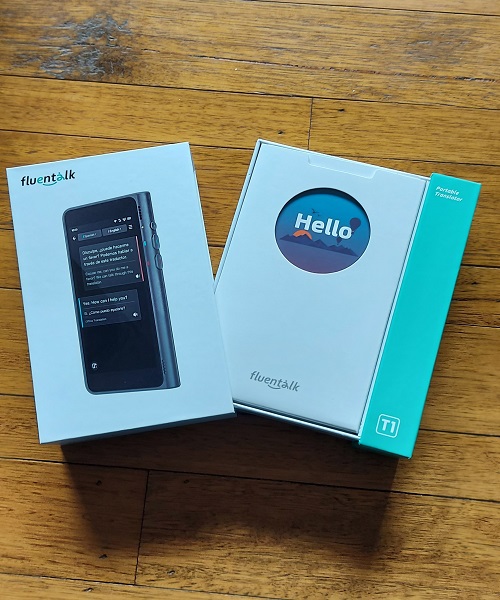
First Impressions of the New Timekettle Fluentalk T1 Mini Handheld Translator

When I first saw the Fluentalk T1 Mini Translator Device, I was surprised at how small and light it was. The device is about the size of a bank card but has three main components: a speaker, a camera, and a microphone. It also supports multiple 36 languages so you can use it in different countries around the world.

T1 mini side view of device


What’s included in the Timekettle Fluentalk T1 Mini box

T1 mini contents


9 Features of the Timekettle Fluentalk T1 Mini Handheld Translator Device


1. One-Button Translation

Experience hassle-free language translation with just one button. T1 Mini’s innovative one-button translation, you can say what you want to say without any fuss. Our smart device automatically recognizes your preset languages, saving you from the hassle of selecting them separately. Plus, the user interface is incredibly user-friendly, with intuitive sliding gestures that require no extra clicks. It’s perfect even for children to use. Transforming translation has never been easier.

2. Translate in 39 Languages with T1 Mini Photo Translation

With an impressive 39-language translation capability. Take a quick snapshot using its high-quality 5-megapixel camera and effortlessly understand menus and signposts in any foreign language. Say goodbye to confusion and hello to instant translations.

3. Get a Year of Free Global Data with T1 mini

Experience hassle-free communication and unlimited global data roaming for a whole year, all thanks to the amazing built-in data card. Forget about buying extra data or dealing with pesky SIM cards while traveling. With a standby time of 7 days, your personal assistant will always be there for you, ensuring you never have to struggle to find free Wi-Fi again.

4. 36 Languages, 88 Accents (Online)

Experience effortless travel, break through language barriers, and explore the world with ease. T1 mini online support offers 36 languages and 88 accents, making it the perfect companion for any globetrotter. Enjoy a truly immersive and hassle-free travel experience like never before

5. 13 Languages (Offline)

No Internet? No Problem! Communicate effortlessly with T1 mini’s offline translation feature supporting 13 languages. Whether you’re on a flight or in a remote area, easily switch to offline translation mode with a simple swipe. Say goodbye to frustrating network issues and enjoy uninterrupted communication on your travels.

6. Experience Unmatched Accuracy – Up to 95% Transcription Accuracy

Featuring dual microphones with ENC noise-cancellation, the T1 mini excels at recognizing audio sources flawlessly. Powered by Fluentalk’s cutting-edge translation engine, it ensures accurate translations in multiple languages with an impressive accuracy rate of over 95%. You can be sure that your message will always get across perfectly.

7. Introducing Rapid Translation with the T1 mini

Experience lightning-fast translation with the T1 mini. Powered by Fluentalk’s advanced speech processing technology, this incredible device effortlessly translates in real-time while flawlessly detecting audio sources. With an impressive reaction time of just 0.5-3 seconds

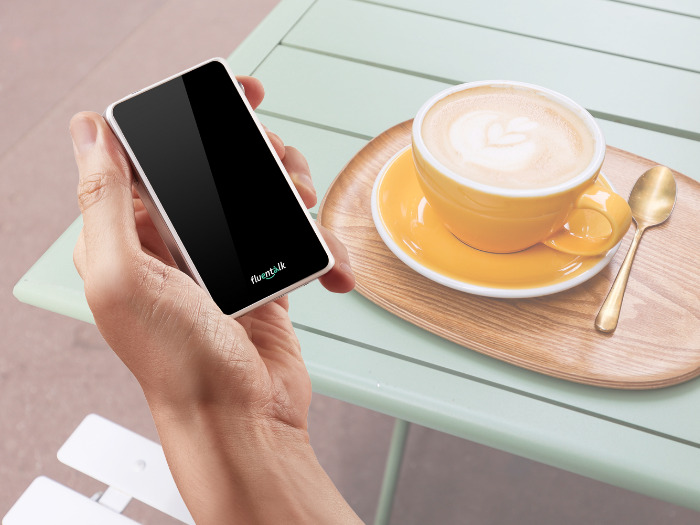
8. Visa Card Size with 2.8″ HD Screen

The compact design of the T1 mini is a standout feature, replicating the size of a standard Visa card and fitting comfortably into your pocket for easy portability. Despite its small size, it boasts a 2.8″ high-definition screen, providing a crystal-clear display and user interface that enhances your translation experience. The screen size is large enough for easy reading yet small enough to keep the device sleek and lightweight at only 80g. The T1 mini’s perfect blend of convenience and functionality ensures effortless communication, even when you’re on the go.

9. Hassle-Free Smart Charging Design

The T1 mini is a dream come true for people who are always on the go thanks to its easy charging design. With its USB-C port, you can conveniently charge your device with any charger and power bank, making sure that switching between devices is a breeze.

T1 mini power button

Getting started with the Fluentalk T1 Mini

Operating the Fluentalk T1 Mini is incredibly simple. Ensure your device is charged before you begin to use it to avoid the battery going flat (no one wants to be out and struggling to understand), the USB-C charger is included in your package. Then all you have to do is switch it on by pressing the green power button on the top of the device (super simple). You can connect to WiFi or simply use the built-in data. There is also a lanyard included in the box, put that on your device to keep it safely on your wrist to avoid dropping it.

T1 mini settings

Operating the Fluentalk T1 Mini

To translate using the T1 mini, just select a language from the list of 36 languages and press the translation button. Speak clearly into the device and wait for the translated message to appear on the screen.

You can also use features such as Photo Translation, Offline Translation, and short statements, by swiping right for photo translations and swiping left for offline translation, and the menu page for shortcut statements, system settings, display, user guide, network, and more. You can swipe down to select settings, airplane mode, and select the brightness of your screen.

The T1 mini is incredibly user-friendly, with a sleek design and intuitive gesture controls that make it easy to use for people of all ages. The device will stay on the last selected language setting so you don’t have to keep selecting it each time you want to translate something. This makes translation fast and efficient, so you can communicate with ease.

T1 Mini languages

Tips for Using the Fluentalk T1 Mini

When using the T1 mini to translate, avoid noisy environments or avoid speaking too quickly; it is better to speak slowly and clearly into the device for accurate translations. When taking a photo translation ensure that the picture is clear and not blurry. It is also important to check the translated message afterward, as not all messages will be 100% accurate.

Avoid using difficult words or slang; stick to simple sentences for more accurate translations and smoother conversations. If you find that the device isn’t translating as accurately as you would like, it may be helpful to try rewording your sentence or speaking more clearly.

T1 mini size

How to use the modes of the Timekettle Fluentalk T1 Mini Translator

The Timekettle Fluentalk T1 Mini Translator has 4 modes – one-button translation, offline translation, photo translation, and quick sentences.

The one-button translation is the most basic and efficient way to translate – simply select a language, press the talk button, speak your sentence into the device, and get an instant translation.

Offline translation mode is great for when there is no internet connection available; you can get accurate translations of up to 13 languages even without being connected to Wi-Fi. Ensure you have downloaded the offline packs prior to going somewhere where there is no internet.

The T1 mini allows you to download a maximum of 4 offline languages onto the device. Once you have the language packs downloaded, simply select the language you want to use, press and hold the button at the bottom of the screen on the offline translation page while speaking. Once you release the button it will instantly translate on screen and in audio.

Photo translation lets you take a picture of any text and get an accurate translation. This is great for translating menus or signs in foreign countries. Select a language you want to translate, take a photo make sure the text is clear, Do not tilt the device, and it will simply translate that text to your selected language, On the bottom right you can press a button that will show you the original, on the bottom left you can have the translation in more text form making it easier to read.

Quick sentence is a saved phrase (only one) that you can access by swiping to the left to save a phrase that you find yourself using all the time, the phrase will be stored here for easy access by simply swiping up from the bottom of the screen on the home page it will play your shortcut sentence in audio.

T1 Mini photo Translation

Languages offered with the Timekettle Fluentalk T1 Mini Translator

The Timekettle Fluentalk T1 Mini Translator offers 36 languages, making it the perfect companion for international travel and communication. You can choose from a range of popular languages such as Spanish, German, French, Arabic, Chinese Simplified/Traditional, Japanese, and more.

36 Languages (88 Accents) online translation

Arabic / Bulgarian / Cantonese / Catalan / Chinese / Croatian / Czech / Danish / Dutch / English / Finnish / French / German / Greek / Hebrew / Hindi / Hungarian / Indonesian / Italian /Japanese / Korean / Norwegian / Polish / Portuguese / Romanian / Russian / Slovak / Slovenian / Spanish / Swedish / Tamil / Telugu / Thai / Turkish / Ukrainian / Vietnamese

13 Languages Offline Translation

English ⇆ Chinese, Japanese, Korean, French, German, Spanish, Russian

Chinese ⇆ English, Japanese, Korean, French, German, Spanish, Russian

**Keep in mind when using the offline translation function, you will need to download the offline language packs you need with internet service otherwise it will not work. *Offline translation pack must be downloaded with an internet connection prior to going somewhere that doesn’t have WiFi.

39 Languages of Photo Translation

Arabic / Bulgarian / Catalan / Chinese / Croatian / Czech / Danish / Dutch / English / Finnish / Filipino / French / German / Greek / Hebrew / Hindi / Hungarian / Icelandic / Indonesian / Italian /Japanese / Korean /Malay / Norwegian / Polish / Portuguese / Romanian / Russian / Slovak / Slovenian / Spanish / Swedish / Tamil / Telugu / Thai / Turkish / Ukrainian / Urdu / Vietnamese

T1 mini offline translation

Battery life of the Fluentalk T1 mini Translator

The battery’s 1500 mAh life is quite impressive, I used it on and off all day to communicate with family here in Portugal and it lasted the whole day with still battery to continue, I feel the translator device will last a good 7+ hours depending on your usage. The device also has an automatic stand-by function which will save on battery power when not in use.

Specifications of the Fluentalk T1 Mini Translator and comparison to the original T1 handheld translator

Below is a comparison table for the original T1 handheld translator with the new T1 Mini handheld language translator, you can also see this specification comparison table on Amazon to see the difference.

The T1 mini is noticeably more compact and lighter than the original T1, however, offers a little less in comparison but this also shows in the cost as the T1 mini is more cost-effective for someone with a smaller budget, the T1 mini is great for entry-level users who just want simple verses translated, therefore it’s a great travelers companion, compared to the original T1 is better in conversations and therefore good use for business as well as travelers.

The T1 mini also auto-detects the language you are speaking, whereas with the T1 you have to select the chosen language.

T1 mini comparison

Specs:

  • Connectivity: WiFi, E-sim (built-in)
  • Charging: Type-C – 5V
  • Weight: 86g
  • Size: 91 x 54.8 x 13.1 mm
  • Battery: 1500mAh

Specs:

  • Operating system: Andriod 10
  • Screen Size: 2.83 inch,  480*640
  • Camera: 500 W, Auto focus
  • Storage: 1G RAM – 8G ROM
  • Global Free Data: 1 year

Pros of the T1 Mini

  • Lightweight, and easy portability
  • Compact, Pocket size
  • No need to connect to your phone
  • Easy to use, suitable for all ages
  • Auto-detection of language
  • Accuracy of translation
  • Good battery life, fast charging
  • Instant Photo translation
  • 1 year of Cellular data
  • Language selection of translations

Cons of the T1 Mini

  • Only can be used as a translation device (compared to the M3 earbuds)
  • Can only save one quick phrase
  • 4 fewer languages from the original T1 (Filipino, Icelandic Malay, Urdu)

The cost of the Timekettle Fluentalk T1 mini-translator

The Timekettle Fluentalk T1 mini Translator is available on Amazon for $149.99 USD, making it one of the more affordable translator devices on the market. This is a great price considering the quality and accuracy of the translations that are produced. Additionally, the device comes with one year of built-in cellular data. You may buy the T1 mini translator for Timekettle direct for the same price, but be sure to check out their official website as often they have a discount on your first purchase and we all love a good saving so be sure to check out any deals before buying.

Do language translators really work?

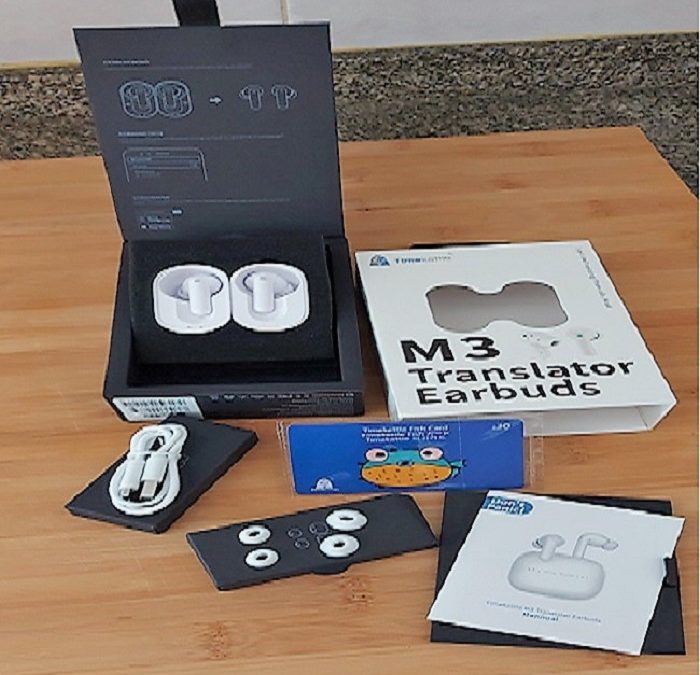
The answer to this is that it really depends on the type of translator you’ve purchased. Many language translators are good at translating basic words and phrases, but cannot capture the nuances of a language or translate complex sentences accurately. However, I have tried 3 language translator devices all from Timekettle / Fluentalk (the T1, T1 Mini, and the M3 earbuds) which all offer similar features.

In my experience, I found that all three devices worked quite well in translating between English and Portuguese and English to Spanish, and vice versa. All Timekettle devices that I have had the privilege to try provide fast accurate translations with good accuracy, although it is still advisable to double-check your translation as it cannot always be 100% accurate.

Conclusion

The Fluentalk T1 mini by Timekettle is a great investment for those who frequently travel around the world and need to communicate in different languages. With its impressive features, such as speech-to-text translations, excellent sound capture, language recognition, accuracy, and compact size, it’s an excellent option for anyone looking for a reliable translator device.

While there are very minor drawbacks such as needing to speak slower and more clearly to get accurate translations, this for me personally was no setback, as all translator devices require you to talk slower, so these are minor compared to the benefits the device provides. The T1 Mini is much simpler compared to the original T1 and half the cost, but does offer less, if you are looking for a simple translator device then consider purchasing the Fluentalk T1 mini if you’re looking to upgrade your communication game I would consider the original T1, but whichever you translation device you choose while you travel the globe, even if you’re not about to travel, and simply want to learn a new language the T1 mini is an affordable tool to learn with.

T1 Mini Timekettle

Would I recommend the Timekettle Fluentalk T1  Mini Translator?

So would I recommend the T1 mini? Absolutely, I would recommend the T1 mini translator if you’re looking for a reliable, simple, and affordable language translator. If you are in the market for a handheld translator that can be more useful for conversations, and business meetings, then you may want to consider the original T1 translator. Along with the T1 handheld devices, I have tested the M3 earbuds that offer 3-in-1 (translation, phone calls, music) depending on what your needs are, Timekettle has a range of products for you to choose from.

Thanks for reading my review on the Fluentalk T1 Mini translator device. I hope you found it useful and that it helps when choosing your next language translation device! 🙂

How To Set Up Your Social Media Platforms: Beginner

How To Set Up Your Social Media Platforms: Beginner

Are you looking to set up your social media platforms but don’t know where to start? Or maybe you’ve started setting them up but aren’t seeing the results you want. In this blog post, we will walk you through the basics of setting up your social media platforms and give you some tips for making sure they are effective.

First, let’s start with the basics. When you are setting up your social media platforms, there are a few key things you need to do:

First Choose the right Social Media platforms.

Not all social media platforms are created equal. You need to choose the platform that is right for you and your business.

The social platforms I have listed below are in no order and remember you can always set up more platforms, later on, you want to avoid becoming overwhelmed and getting nowhere.

Social Media Platforms

***This post contains affiliate links. If you make a purchase through clicking the link, we may earn a small commission at no additional cost to you.***

Create interesting and engaging Social Media content.

Your social media platforms will only be as successful as the content you put on them. Make sure you are creating content that is interesting and engaging. This can be anything from blog posts to infographics to videos and photos.


Interact with your audience across all Social Media.

Social media is not a one-way street. You need to interact with your audience if you want to build relationships and grow your platform. Make sure you are responding to comments and questions and engaging in conversations, after all it is called “SOCIAL” media.

Promote your Social Media platforms.

Just because you have created social media platforms doesn’t mean people will automatically find them. You need to promote your platforms and make sure people know they exist. You can do this through marketing campaigns, social media ads, and word of mouth or sharing what you do in groups (keeping in mind the group’s rules as many don’t allow to self-promote, so be sure to check that out prior to sharing in group pages).

Now that you know the basics of setting up your social media platforms, let’s look at some tips for making sure they are effective.

Set goals

Before you start creating content or promoting your platforms, you need to set goals. What do you want to achieve with your social media platforms? Do you want to increase brand awareness, drive traffic to your website, or generate leads? Once you have set your goals.

Create a content calendar for Social Media

One of the best ways to make sure your social media platforms are effective is to create a content calendar. This will help you plan and schedule your content in advance so you can make sure it is aligned with your goals. It will also help you avoid last-minute scrambling to come up with content ideas.

Tip: Meta in Facebook has a content planner you can schedule your content in advance to save time but having a notebook or a calendar at home will help map out what you what to share.

Social media Content planning

Automate and outsource

There are a lot of tasks that come with running social media platforms, from publishing content to interacting with your audience. If you try to do everything yourself, you will quickly become overwhelmed. That’s why it’s important to automate and outsource as much as possible. There are several tools that can help you with this, from social media management platforms to content curation tools.

Analyze and optimize

Finally, you need to analyze and optimize your social media platforms on a regular basis. This means seeing what is working and what isn’t. Then, you can make changes to your content, posting frequency, and promotion strategy to improve your results.


Now, let’s dive into getting you set up with the social media platforms that best suit you and your business needs.

Setting up a business Facebook Page

The first step to setting up your social media platforms is creating a Facebook Page for your business. A Facebook Page is different than a personal profile page and allows you to promote your business, products, or services to people who are not already friends or followers.

First, make sure you are logged into your personal Facebook account, then select Pages and then Create. Depending on your device, this will be in different locations on your screen.

You will be prompted to fill out some basic information about your business, such as the name, address, and category of business you can list up to 3 different categories that apply, for example, if you are a travel blogger you could list your page as – Blogger & Local & Travel website, etc. Follow the prompts to set up your account, it is very straightforward.

You will also be able to upload a profile picture and cover photo for your Page.

IMPORTANT:

Do not create a new Facebook login. Only create a page from your current Facebook account. Your Facebook friends will not see that you created this page unless you choose to share it with them. (Hopefully, you will)

With your personal Facebook profile, you will be the “admin” of your new Page and will have full control over what is posted and who can see it. You can add additional admins at any time by going to your Page settings and selecting the “Page Roles” option, this can be a good idea to add someone you trust, in case you ever get hacked or logged out, the other person can help you get access back.

Helpful Tip:

Download the app Business Suite (Meta) on your phone or Ipad, this can help you keep up to date with messages to your business page and see insights, your content planner, Ads, events, and appointments, even you can create posts inside the business suite too. I use it on a daily basis, I find it to be a very helpful App.

Now that your Facebook Page is created, you can start posting content! We recommend posting a mix of content, including text updates, photos, videos, and links. You should also take advantage of Facebook’s built-in features, and take some time to explore what Facebook offers business pages in order to get more eyes on your content.

Social Media FB

Setting up an Instagram business account

Instagram is a mobile app as well as desktop that allows users to share photos and videos. It is different from other social media platforms in that it is very visual and focuses on user-generated content.

To create an Instagram account for your business, download the app from the App Store (for iOS devices) or Google Play Store (for Android devices). Once the app is installed, open it and tap “Sign up with Email” or “Log in with Facebook”.

If you choose to sign up with Email, you will need to enter your full name, and email address, and create a username and password. If you choose to log in with Facebook, you will be prompted to enter your Facebook login information.

Once you have logged in or created your account, you will be taken to the Instagram home screen. Here, you can start sharing photos and videos by tapping the “+” icon.

To edit your profile, tap the “Edit Profile” button. From here, you can add or change your profile picture, name, username, website, and bio. Be sure to fill out all these fields so that people can easily find and learn more about your business.

You can also link your Instagram account to other social media platforms, such as Facebook, Twitter, or your website. To do this, go to your profile and click edit profile and you will find all the info to update here, your Bio, your name, username, category, contact options, and links.

Make sure you fill in your bio, have a profile picture, and have a link to direct people to where you want them to go after consuming your content, what is your goal? Send them there.

Tip:

In your Name section, don’t just write your name, sounds weird, but your name section can be very helpful when people are looking for something, such as keywords, for example, if you are in the travel niche, you could have your name so people know who they are talking with and seeing, then add anything about travel, can simply be the word “Travel” or the type of travel you’re into.

My Instagram name for example is – Tia – Mentor – Online Marketer – Travel.  This way if anyone searches any of the keywords (Travel, Mentor, or Online marketer) I can come up in their search. It can help get more eyeballs on your page for free.

For your bio, write something catchy that represents you, or write a little call to action on what you do, such as “I help people get XYZ” or follow for travel inspo and tips”. The downfall to Instagram’s bio section is the limit of characters you can write in there, must be short and punchy.

You must have a profile picture for your socials, people like to know who they are talking to, and you can have your biz logo, but I recommend having your picture so people can feel connected to who is posting and who they are engaging with.

Setting up a Pinterest account for business

Pinterest is a great social media platform that allows users to share and discover new interests by pinning images, it’s a great way to get traffic to your website or socials. Pinterest is a very popular choice for bloggers to use as it tends to drive most of the traffic to your site.  It is a great platform for businesses that are visual in nature, such as businesses in the fashion, food, travel, and home décor industries.

Be sure to create a business account for your Pinterest this will give you access to extra information and stats for your business, set up your Pinterest account now.

Follow the prompts to set up an account, it’s a very simple process. Once you have created your account, you will be taken to the Pinterest home screen. Here, you can start creating pins by clicking the “create”. You can also access your profile by clicking on your profile image.

In your profile name, like the tip for Instagram, rather than just your business name, use keywords that relate to your business. This is mine – Suitcases and serenity / Blogger / Affiliate marketer / Digital, so if anyone searches for any of their names, I can be in their results.

Creating a Twitter profile

To create a Twitter profile, go to Twitter and enter your full name, email address, and desired password. You will also be asked to select a username, or “handle,” for your account. We recommend choosing a handle that is easy to remember and closely aligned with your business name. Don’t get disheartened if the name is already taken, I wanted mine to be my business name “Suitcases and Serenity” but it was taken, so you can try another one or it will give you some other selections you can pick from, so I needed up with @SuitcasesLove for my Twitter handle.

Once you have created your account, you will be taken to your Twitter homepage. Here, you will be able to edit your profile and upload a profile photo and cover photo. We recommend using a high-quality image for your profile photo, as this is what will be shown next to all your tweets.

Your Twitter profile also includes a “Bio” section, where you can enter a brief description of your business. Be sure to include keywords that you think people might search for when looking for a business like yours. For example, if you are a florist in Los Angeles, you might include keywords like “flowers,” “weddings,” and “LA.” For a travel blogger things like “blogger”, “travel”, and “travel blogger”, you get what I mean. Also, use a couple of hashtags in here too, and put a link to your website or socials for people to go to.

Once your profile is complete, you can start tweeting this can be in simple written form or images/videos too! 

Creating a LinkedIn Company Page

LinkedIn is a social networking site designed specifically for professionals and businesses, it’s a great place for career development and many people put their CV’s on LinkedIn to find job opportunities and employers also looking to hire.

To create a LinkedIn Company Page, go to LinkedIn and enter your company name, email address, and password. Once you have created your account, you will be taken to your LinkedIn homepage.

From here, you can begin filling out your Company Page. Be sure to include a high-quality profile photo and cover photo, as well as a brief description of your business. You can also add your company website and contact information. 

Setting up a TikTok business account

We have all heard of TikTok I am sure, it may also have a label that it’s for “Young people” and posting silly things, but surprisingly TikTok is great for inspiration, tips, motivation, and more.

TikTok is a social media platform where users can share short videos. It’s great bitesize content.  

To set up a TikTok account for your business, go to TikTok and create an account. Once you have created your account begin filling out your profile. Have a profile photo, as well as a brief description of what you do.

There are many fun things you can do with the TikTok platform, so have some fun exploring, you can post videos from 15 seconds, 60 seconds, and 3 minutes, and you can add effects, music, and more, Save the profiles you enjoy watching. TikTok can be a great source of gaining customers and prospects for your business. 

Social Media Tik Tok

There you have it, a beginner’s guide to setting up your social media platforms. Be sure to take some time to fill out your profiles and make them look professional. When posting on these platforms, remember to be engaging and post interesting content that will capture the attention of your target audience.

Enjoy using social media to connect with customers, build relationships, and grow your business. Thanks for reading!

Complete Truth On The Timekettle Fluentalk T1 Handheld Translator

Complete Truth On The Timekettle Fluentalk T1 Handheld Translator

Timekettle Fluentalk T1 Handheld translator – Staying connected with the world, one hand-held device at a time. Translate anytime, anywhere.

As the world becomes increasingly interconnected, the need to be able to communicate with people from all over the globe has never been greater. The problem is that not everyone speaks the same language. This is where the Timekettle Fluentalk T1 Handheld Translator comes in. If you’re looking for an easy and convenient way to translate foreign languages, then the Timekettle T1 Translator is the perfect device for you.

This innovative translator can quickly and accurately translate over 40 different languages, making it perfect for travelers, business professionals, or anyone who needs to communicate with people from other countries, what makes this translation device different from the earbud translation gadgets is the ability to translate images, need to read a menu or documents, no problems the T1 has you covered, Added bonuses are a world clock and exchange rates, it really is the all in one translation device.

Who is Timekettle as a company

Timekettle is a technology company whose headquarters is located in Shenzhen, China, with an operation and customer center based in Los Angeles, United States. Founded in 2016, the company specializes in developing innovative language translation products and services that make it easy to communicate with people from other countries.

Timekettle has launched five different products, each with its own unique features, the T1 handheld being their latest design. 

Timekettle is the top-selling brand in the Translator Device industry worldwide. They are dedicated to providing the most accurate and user-friendly language translation products on the market. Their team of engineers and designers have used cutting-edge technology, such as AI and deep learning algorithms, to create a product that can accurately translate over 40 different languages in real-time.

Timekettle T1 handheld translator
Timekettle Fluntalk T1 handheld translator in box

First Impressions of the Timekettle Fluentalk T1 Handheld Translator

I was pleasantly surprised by the Timekettle Fluentalk T1 Handheld Translator. It is small, lightweight, and easy to use. I was able to quickly translate text into 40 different languages which allowed me to communicate effectively with people from other countries. The image translation feature was especially useful as it enabled me to better understand menus, documents, and other written materials. The world clock and exchange rates were also helpful in managing my time and money while traveling abroad.

Timekettle Fluntalk T1 handheld translator back of box info
Timekettle Fluntalk T1 handheld translator side of box


What’s included in the Timekettle Fluentalk T1 Handheld Translator box


Timekettle Fluntalk T1 handheld translator boxed items
Timekettle Fluntalk T1 handheld translator


How to start using the Timekettle Fluentalk T1 Translator


Getting started with the Timekettle Fluentalk T1 Handheld Translator is super easy. The thing I love about the T1 is that you don’t have to download an app on your phone, compared to the M3 earbuds that have to be used in conjunction with an app. The main components of the T1 device are a small display with touch, a microphone, and three buttons on the side.

To begin, just turn on your translator by pressing the power button (yellow) located on the right side of the device. You will then be prompted to select your language and connect via Bluetooth or wifi. Once that is done, you can start translating!

The Cellular 2-year plan is pre-loaded on the device when I got the device I was looking for the sim card to put into the T1 but heads up there isn’t one, it’s already on the device without a sim card. The translation will appear on the display in real-time. For image translations, simply take a photo of the document or menu and the T1 will translate it for you.

Timekettle Fluntalk T1 handheld translator front device
Timekettle Fluntalk T1 handheld translator back of device
Timekettle Fluntalk T1 handheld translator


Modes of the Timekettle Fluentalk T1 Translator

There are four main modes on the Timekettle T1 Translator and they are One-Click Translation, Photo translation, Ask for Directions, and Chat translation, along with a few other cool features.

One-Click Translation mode

This is one of the main features of the Timekettle Fluentalk T1 Translator. It allows you to translate from one language to another quickly and accurately, the T1 translator has microphones on both ends of the device making it clearer for the device to hear the words spoken.

The One-Click Translation mode is great for quick and simple translations, whether you need to translate a phrase or a sentence. Just press the ‘Translate’ button and the T1 Translator will instantly translate your words into any language of your choice.


Photo Translation Mode

Allows you to take a photo of a document, menu, sign, etc. and translate it into your desired language. This feature is great for those who need to understand written materials quickly and accurately.


Ask for directions mode

Provides you with pre-selected questions you set up and save depending on the language you want it pre-configured into. So if you have questions you generally use when visiting different countries you can pre-save these questions here, making it more quick to use.


Chat translation mode

Allows you to have conversation with locals, by translating your conversation into their language and theirs into yours. This feature is great for communicating in any of the 40 languages that are supported on the Timekettle T1 translator. I find this mode very similar to the One-click mode as they both do the same thing, but this chat mode shows the conversation on the screen as you talking from both parties. 

Timekettle Fluntalk T1 handheld translator

The Fluentalk T1 translator also has features such as common expressions which have 9 languages to choose from and gives you pre-selected questions for things like needing a bank, urgencies, restaurant, hotel, and more. This feature is great and so helpful and makes it quick and easy to ask for directions. The only downfall to the common expression mode is not having all languages.

Timekettle Fluntalk T1 handheld translator common expressions
Timekettle t1 handheld translator common expression languages
Timekettle Fluntalk T1 handheld translator

SOS mode

Is also on the Timekettle Fluentalk T1 Translator which will help you find the emergency numbers of each country you are visiting in case something happens. It gives you the country calling code and the emergency number like 911, 112, and so on when you are in SOS needs.

Voice Memo

Allows you to record exactly a voice memo/note, a handy feature if you have something on your mind or at a place or point you want to remember but don’t have a pen and paper handy, record yourself in the voice memo section and it is transcribed into words.

World Clock

Provides you with time in different cities/ Countries making it easier and convenient for you to cross any border you may be traveling to.

Exchange rate

Gives you real-time exchange rates in various currencies.

Timekettle Fluntalk T1 handheld translator world clock
Timekettle Fluntalk T1 handheld translator SOS

The design of the Timekettle Fluentalk T1 Translator

The design of the Timekettle Fluentalk T1 Translator is sleek and stylish. The device measures just 4.5 x 2.5 inches, making it small enough to fit in your pocket or carry around with ease. It also comes with a lanyard so you can wear it around your wrist for easy access.

The T1 has a black matte finish that looks modern and sophisticated. The device also has three buttons on the side for easy access to the power, volume, and language selection. The touch display is clear and easy to read, allowing you to quickly translate text or documents in real time with ease. As you can see in the images below it’s the same width as my bank card and slightly taller and as thick as a phone.

Timekettle Fluntalk T1 handheld translator size
Timekettle Fluntalk T1 handheld translator

Languages offered with the Timekettle Fluentalk T1 Translator


The Timekettle Fluentalk T1 Translator offers 40 languages for you to translate into. It is perfect for those who need a quick and accurate translation of the language they are trying to learn or maybe just want to quickly understand a sign or menu. The languages offered are:


40 Languages(93 Accents) online translation

Arabic / Bulgarian / Cantonese / Catalan / Chinese / Croatian / Czech / Danish / Dutch / English / Finnish / Filipino / French / German / Greek / Hebrew / Hindi / Hungarian / Icelandic / Indonesian / Italian /Japanese / Korean /Malay / Norwegian / Polish / Portuguese / Romanian / Russian / Slovak / Slovenian / Spanish / Swedish / Tamil / Telugu / Thai / Turkish / Ukrainian / Urdu / Vietnamese

13 Languages Offline Translation

English ⇆ Chinese, Japanese, Korean, French, German, Spanish, Russian

Chinese ⇆ English, Japanese, Korean, French, German, Spanish, Russian

**Keep in mind when using the offline translation function, you will need to download the offline language you need while you have internet service otherwise it will not work. *The offline translation pack must be downloaded with an internet connection.

39 Languages of Photo Translation

Arabic / Bulgarian / Catalan / Chinese / Croatian / Czech / Danish / Dutch / English / Finnish / Filipino / French / German / Greek / Hebrew / Hindi / Hungarian / Icelandic / Indonesian / Italian /Japanese / Korean /Malay / Norwegian / Polish / Portuguese / Romanian / Russian / Slovak / Slovenian / Spanish / Swedish / Tamil / Telugu / Thai / Turkish / Ukrainian / Urdu / Vietnamese

Timekettle Fluntalk T1 handheld translator


Battery life of the Timekettle Fluentalk T1 Handheld Translator


The Timekettle T1 Translator can continuously translate for about 3.5 hours, when I tested the T1 it lasted around 5 hours, and let’s face it I wasn’t talking solidly for 3.5 hours straight. Timekettle states it takes about 210 minutes to charge the T1 translator, but I didn’t find it took that long, mine took less than 2 hours to charge.


Pros and Cons of the Timekettle Fluentalk T1 Handheld Translator


There are many different language translation Apps and devices on the market. However, the Timekettle Fluentalk T1 handheld Translator is one of the best. It’s an easy-to-use device that can translate between languages in real time.

One of the great things about the T1 Translator is that it can be used for a variety of different situations. Whether you’re traveling to a foreign country and need help communicating with locals, or you’re trying to learn a new language, the T1 Translator can be a big help. Here is a list of the pros and cons I found when using this handheld translation device.


Pros:

  • Lightweight, compact, and portable
  • No need to connect to your phone
  • Accuracy of translation
  • Good battery life
  • Instant Photo translation
  • 2 years of Cellular data
  • Online and offline voice translation
  • Supports 40 languages in 93 accents
  • World clock and currency converter

Cons:

  • Only can be used as a translation device
  • Minimal offline languages
  • Expensive
  • Only 9 languages to use in the Common Expressions mode


Key features of the Timekettle Fluentalk T1 Translator

The Timekettle T1 Translator is a revolutionary device that can quickly and accurately translate over 40 different languages. It’s designed to be user-friendly, with an intuitive interface and touchscreen viewing.

The T1 Translator also has an 8-megapixel rear camera which allows it to instantly translate images in 39 languages. This can be used to quickly translate menus, documents, and signs while you’re traveling or in a foreign country.

The Timekettle T1 Translator also has a built-in microphone array with an EDC noise reduction algorithm that accurately picks up human voice from a noisy environment, ASR technology. This means that it’s able to deliver high-quality translations in real time.

In addition, the T1 Translator comes with two years of language updates and mobile data from over 200 wireless network operators worldwide. It also has a built-in world clock and currency converter so you can easily check the current local time in any city or get up-to-the-minute international currency exchange rates.


Other key features include

  • 95% Accuracy in 40 Languages and 93 Accents
  • Offline Translation for 8 Languages
  • 2-year Cellular Data Plan
  • Image Translation with 4-inch Ultra-Clear HD Screen
  • Worldwide shipping
  • 12 months warranty

Specifications of the T1 handheld translation device

  • Wireless Network Technology: 2G/3G/4G LTE
  • Connectivity: WiFi, Nano-sim, E-sim (built-in)
  • Charging: Type-C – 5V
  • Operating system: Andriod 10
  • Speakers: Dual speakers
  • Screen Size: 4.0″Oncell 540*1080
  • Camera: 8 megapixels
  • Storage: 3G RAM – 32G ROM


What happens when the 2-year cellular data runs out


When the two-year cellular data plan runs out, you can still continue to use the Timekettle T1 Translator for all its other features by inserting a mobile sim card or by using a Wi-Fi connection.

Timekettle will be launching data plans at a later date that will allow you to purchase a cellular data plan directly with Timekettle, this is in the process, and if you buy a Timekettle T1 handheld device be sure to keep an eye out on your emails, or their website for updates.

What does the Timekettle Fluentalk T1 Handheld Translator cost?


The Timekettle Fluentalk T1 Handheld Translator retails for $299 USD. This price includes two years of cellular data, making it one of the most affordable and reliable translation devices currently available on the market.

Timekettle Fluentalk T1 Handheld Translator is available for purchase on the Timekettle website and Amazon.


Timekettle Fluentalk T1 Handheld Translator Vs M3 Translator Earbuds


The Timekettle Fluentalk T1 Translator is a handheld translator device, while the M3 Translator is a 3-in-1 earbud and offers a different type of translation experience. The M3 Translator earbuds are a unique device that utilizes voice recognition, you can simply speak into one earbud and have your words translated into another language through the other earbud.

However, the Timekettle Fluentalk T1 Translator offers more features than the M3 Translator. It includes instant photo translation, world clock, and currency exchange rates, high translation accuracy, no need to connect to your phone, and more.

In terms of cost, the Timekettle M3 earbuds are more affordable than the T1 Handheld Translator, which retails at $119 to $149 compared to $299 for the T1, but again depending on what type of experience you are looking for if earbuds or a handheld translator is a better fit for you.

Timekettle Translator

Would I recommend the Timekettle Fluentalk T1 Translator?


Yes, I would recommend the Timekettle Fluentalk T1 Handheld Translator. I am highly impressed by its accuracy and range of features, it is an invaluable tool for travelers and business professionals. The other thing I loved about the T1 is not having to connect it to your phone and download an app, but on the other hand, compared to the earbud translation the T1 can only be used purely as a translator device, so if you do a lot of traveling this is for you.

Furthermore, the compact size makes it easy to take with you wherever you go. The Timekettle Fluentalk T1 Handheld Translator is more on the expensive side but it is in my opinion worth the price tag and highly recommended!


The Final Verdict

The Timekettle Fluentalk T1 Handheld Translator is one of the most reliable translation devices currently available on the market I believe. It is easy to use, accurate, and comes with a wide range of languages. The additional features such as image translation, world clock, and currency exchange rates make it an essential tool for anyone who needs to communicate with people from other countries.

How To Start A Blog In 9 Easy Steps Now

How To Start A Blog In 9 Easy Steps Now

Blogging is a great way to express yourself, share your interests with the world, and even make some money. But where do you start? Starting a blog can seem daunting, but it doesn’t have to be. With a little planning and effort, you can have a great blog up and running in no time.

In this blog post, I will share with you 9 steps to getting you started with blogging.  So let’s get started.


  1.  Pick your niche.
  2. Choose your domain name.
  3. Start your Blog, Choose your Theme
  4. Start Brainstorming content ideas
  5. Start your Brand, your Logo, colour palette, font, etc.
  6. Start your “About me” page
  7. Start creating a blog post
  8. Apply for affiliate programs to monetize your blog
  9. Start your social media accounts for business

***This post contains affiliate links. If you make a purchase through clicking the link, we may earn a small commission at no additional cost to you.***

Pick your niche for your Blog

Picking a niche for your blog is an important first step to deciding what you will write about and share with your readers. things like.

  • What are you passionate about?
  • What do you want to share with the world?
  • Is it  a topic you know much about to feel comfortable writing consistently to share information

When you find your topic, stick with it! People will come to your blog to read about the specific thing you’re talking about, so stick to your niche.

Make sure your niche is truly something you are passionate about because you don’t want to burn out writing about something that doesn’t light you up.

Choose your domain name

Choosing a domain name is one of the most important steps in starting a blog. Your domain name is how people will find your site, so you want to choose something that is easy to remember and reflects your brand.

Once you’ve chosen your domain name, be sure to register it! You can usually do this through the hosting provider you choose to make your website with.

Tip: When picking a domain name it is said not to use numbers as you will forever be explaining to people how your website name is spelled, for example, use – foryou, not 4you, and the same goes for being short on words like – you Vs u. If you are going to be explaining all the time how your site is spelled, it can be very annoying. Keep it simple but unique for you.

Blog Domain name

Choose your Theme for your blog

Now it’s time to start your blog! Once you’ve registered your domain name, you’ll need to choose a blogging platform and a theme. A blogging platform is a software that you’ll use to create and manage your blog.

WordPress is a popular choice for many bloggers, but there are other options available as well. Once you’ve chosen your platform, it’s time to select a theme. This will determine the look and feel of your blog, so take some time to browse through different options and find one that you like, there are free themes within WordPress, I use Bluehost for my blog which uses WordPress and I have a paid theme from DIVI, for someone like me who is not very tech-savvy, DIVI has made the process of my webpage so user friendly and to understand. You can read my blog post about getting started with Bluehost.


Start brainstorming content ideas

When you’re ready to start creating content for your blog, it can be helpful to brainstorm ideas ahead of time. This will give you a road map to follow as you write, and it will help to keep you on track. If you’re struggling to come up with ideas, there are a few ways you can get started:

Check out other blogs in your niche. What are they talking about? Is there anything you can add to the conversation/ topic – make it your own, never copy!

  • Look at popular magazines and websites. What are people interested in right now?
  • Think about the questions people are asking. This can be a great way to come up with blog post ideas that are relevant and helpful, Tip: you can look at Reddit or Quora for ideas.
  • Keep a running list of ideas. As you think of things throughout the day, jot them down so you don’t forget. This will help to keep your creative juices flowing when it’s time to sit down and write.

I recommend having at least 10 blog posts on your website before you decide to launch.


Start your Brand, your Logo, color palette, font, etc.

Creating a brand for your blog is a great way to make it stand out from the millions of other blogs out there. Your brand should be reflective of you and your values, and it should be consistent across all platforms. A few things to consider when creating your brand. 

  • Your logo

This is often the first thing people will see when they come to your blog, so you want it to be eye-catching and memorable. If you’re not a designer, there are plenty of logo makers out there that can help you create a great logo for your brand such as Fivver.

If you want to give it a go yourself before having to pay try Canva it is one of my favorite tools for creating graphics. They have a ton of templates for different sizes and purposes, so you can easily create graphics for your blog posts, social media, ads, etc, they have plenty of choices in their free version, or if you’re looking for more options you can pay for the Pro version, I have the Pro version as I use Canva for my blog and all my social media content, so it has been worth every penny.

  • Your color palette

Choose a few colors that you want to be associated with your brand and use them consistently, you can search the internet for color combinations that go well together, otherwise, go with what feels right for you, generally pick 3 colors that will represent your brand.

  • Your font

Just like with your colors, you want to choose a font (or family of fonts) that you’ll use on all of your branding materials. This will help to create a cohesive look for your brand. I generally have no more than 2-3 different fonts I use across my blog. 

Blog Content

Creating an “About me” page

An “About me” page is one of the most important things you can do for your blog. This is your chance to tell your readers who you are and why they should care about what you have to say. When creating your “About Me” page, there are a few things you’ll want to include:

  • Your name: Make sure to include your name so people know who they’re reading. You can also include your blog’s name if it’s different from your personal name.
  • Your photo: Adding a photo is a great way to make your “About Me” page more personal. People like to see who they’re reading from, and it helps them to connect with you on a more personal level.
  • Your story: Why did you start blogging? What are your goals for your blog? Share your story with your readers and let them know what they can expect from reading your blog.
  • Your values: What do you believe in? What kind of tone do you want to set with your blog? Let your readers know what they can expect from you and your content.
  • Your contact information: Make sure to include a way for people to get in touch with you, whether it’s an email address, social media handle, or contact form. This is important for building relationships with your readers. 

Creating great content for your blog

One of the most important parts of starting a blog is creating great content. Without killer content, you’re not going to have people coming back to read your blog. So how do you create great content? Here are a few tips:


  • Be yourself: Write as you talk. Be natural and authentic in your writing, and people will connect with you.
  • Write about what you know: Share your experiences, your knowledge, and your insights on the topics you write about.
  • Be helpful: Write posts that are helpful and informative. Teach your readers something new or help them to solve a problem.
  • Be engaging: Write in an engaging and entertaining way. Keep your readers hooked by sharing interesting stories and using humor in your writing.
  • Be consistent: The key to keeping people coming back is consistency. Make sure to post new content on a regular basis (at least once a week, if not more).
Blog content planning

Apply for affiliate programs to monetize your blog

After you have built up a good amount of content and have a decent-sized audience, you can start to apply for affiliate programs to monetize your blog. Affiliate programs are basically when you promote someone else’s product or service on your blog and if someone buys the product or service through your link, you earn a commission.

There are tons of different affiliate programs out there, so you’ll want to do some research to find the ones that are a good fit for your blog. Once you find a few programs you’re interested in, reach out to the companies and inquire about joining their affiliate program.

Applying to affiliate programs can be a bit of a process, but it’s well worth it if you’re able to get approved for some good programs. Not only can it help you to make money from your blog, but it can also help to promote products and services that you’re passionate about.

Many businesses have a link on their site to join affiliate programs, so keep an eye out, generally in the footer of the website.

Blog Monetize

Start your social media accounts for business

Social media is a great way to promote your blog and connect with your audience. By having active social media accounts, you can share your new blog posts with your followers, which can help to drive traffic to your site. You can also use social media to build relationships with other bloggers and influencers in your niche.

When it comes to social media, there are a few key platforms that you’ll want to focus on:

Twitter:

Twitter is a great platform for sharing your blog posts and connecting with other people in your niche. Make sure to use hashtags and tag other people in your tweets to get more eyes on your content.

Facebook:

Facebook is another great platform for sharing your blog posts and connecting with your audience. You can create a Facebook page for your blog and share your content there if you don’t want to use your personal page. I have a business Facebook page linked to my personal page which is super easy to set up and you can track your analytics too.

Pinterest:

Pinterest is a great platform for driving traffic to your blog. Make sure you create pins that are visually appealing and share them on Pinterest. Pinterest is most likely voted #1 for sharing blog posts, creating pin graphics in Canva will help them stand out and draw attention to your site. Pinterest is also a great platform to find inspiration for everything.

Instagram:

Instagram is a great platform for promoting your blog and connecting with your audience. Make sure to post eye-catching photos and use the appropriate hashtags. Instagram is more of a visual platform as the image comes first, compared to Facebook, people tend to read the caption more before the image.

TikTok:

TikTok allows users to share short videos of themselves. It’s a great platform. Make sure to post interesting videos and use hashtags to get more eyes on your content.

YouTube:

YouTube is a great platform for sharing your content in longer video form. You can also use YouTube to build relationships with other bloggers and influencers in your niche, even companies, Canva is a great place to do an intro and outro to your video too.

To learn more about “how to set up your social media accounts for business” check out my blog post ” Beginner’s Guide & Tips to Setting Up Your Social Media Platforms“, this post will help walk you through getting started.

Social Media Platforms

Extra Tip: SEO to improve traffic to the blog

SEO stands for “search engine optimization.” It is the process of optimizing your website for Google search with the goal of earning higher web traffic levels and improving your overall visibility online.

There are a variety of ways to optimize your website for SEO. Some of the most common methods include:

  • Keyword research:

Identifying and targeting the right keywords is essential for SEO success. Use keyword research tools like SEMRUSH or Ahrefs to identify popular keywords related to your topic, these do cost money but can be well worth the extra dollar if you can generate an income from your blog. You can also download some free keyword search plugins in your internet browser like keyword surfer, when you search google for a topic it will show you keyword ideas.

  • On-page optimization:

Once you’ve identified the right keywords, you can start implementing them into your website’s content. This includes things like using keywords in your headlines, throughout your content, and in your meta tags.

  • Link building:

Link building is the process of getting other websites to link back to your website. This helps improve your website’s authority and can boost your SEO efforts.

  • Content marketing:

Creating high-quality content is essential for SEO success. Not only does it help you target the right keywords, but it also helps to build links and improve your overall visibility online.

By following these SEO tips, you can improve your website’s traffic and visibility in Google searches. This, in turn, can lead to more leads, sales, and conversions for your business.

There is a lot to learn about SEO, If you don’t understand SEO at the beginning, don’t stress, it takes time, there are plenty of free resources out there to get more knowledge on how SEO works, check out Pinterest from other bloggers or Google for more in-depth information.

LASTLY 

Remember when your blog is live and you are getting traffic and readers to your posts that you engage with your audience. Respond to comments and questions. Share other people’s content that is related to your niche. The more engaged you are with your audience, the more likely they are to keep coming back.

There you have it! 9 easy steps to start a successful blog. Just remember to be patient, consistent, and engage with your audience and you will be on your way to success. Thanks for reading!

Ultimate Review on The Timekettle M3 Translator 3-in-1 Earbuds

Ultimate Review on The Timekettle M3 Translator 3-in-1 Earbuds

Traveling to a foreign country can be daunting if you don’t know the language. Even if you do manage to learn some of the basics, there are still bound to be words and phrases that you won’t understand.

Not being able to communicate with locals can make travel very difficult and frustrating even when it comes to simple things like ordering food at a restaurant, asking for directions, or even buying souvenirs.

This is where the Timekettle M3 translation earbuds solve this problem. These earbuds are designed to help you communicate with people in 40 different languages and 93 accents in real-time with 95% accuracy.

All you need to do is speak into the earbud and it will automatically translate your words into the language of your choice. You can also use these earbuds to listen to the other person’s response in your language so that you can easily carry on a conversation without any barriers.

If you’re looking for a quality pair of earbuds that can also be used as a language translator, to make and receive phone calls, and listen to music, the Timekettle M3 is a great option.

These earbuds offer three translation modes: phone conversation, music listening, and simultaneous interpretation mode. They are also compatible with both Apple and Android devices. In this review, we will take a closer look at the features and benefits of the Timekettle M3 3-in-1 translation earbuds.

Timekettle box set up

First Impressions 

The Timekettle M3 translation earbuds are very sleek and compact. They come in a black carrying case that doubles as a charging station. The earbuds themselves are white with a silver accent around the edge. They have a small LED light on the front that shows you when they’re powered on and indicates battery life. The earbuds are very lightweight and comfortable to wear, even for long periods of time.

M3 earbuds in box


What’s included in the box

  • Timekettle M3 earbuds
  • Charging case
  • USB charging cable
  • 3 different sizes of ear tips
  • User manual
  • Quick start guide
  • X30 Fish card -Offline pack only
Full timekettle set


How to start using the Timekettle M3 translator earbuds


The Timekettle M3 translation earbuds are very easy to use. Once you’ve charged them up, simply download the Timekettle app power them on, and pair them with your smartphone via Bluetooth.

Then, open up the Timekettle app and select the language you want to translate to. Once that’s done, just put on the earbuds and start speaking. You can also use the touch control panel to play, pause, or skip tracks, and answer phone calls. The earbuds will automatically translate your words into the selected language.

M3 Menu


Using the different Translating modes

Once connected, you can choose from one of three translation modes – Touch Mode, Listen Mode, or Speaker Mode.

Touch mode

This is where you will have one earbud and share the other earbud with the person you are speaking with offering a simultaneous interpretation.  This is the default mode and is great for one-on-one conversations.

Simply touch the earbud to activate it and start speaking. The M3 will translate your words into the chosen language and play them back through the earbuds, each time the person wants to speak, be sure to touch the earbud they are using before starting to speak.

Listen mode

This mode is perfect for situations where you need to listen to a conversation, such as in a meeting or lecture. Simply activate the mode and the M3 will start translating.

You can then play the recording at any time and choose to have it translated into your language of choice. Place your phone near the speaker and listen for the translation in your earbud.

Speaker mode

This mode is great for group situations where everyone needs to be able to hear the translation. Simply activate the mode and the M3 will start translating. The translated words will be played through the earbuds as well as your smartphone’s speaker, so everyone can hear.

With speaker mode, you only need to wear one earbud, however, I noted you will need to remove the other earbud from the charging case to have it work.


Etihad Stadium

The Design   

The overall design of the Timekettle M3 translator earbuds is very sleek and elegant. The earbuds are small and compact, and the charging case is also very slim with a magnetic lock.

The earbuds themselves are white. They have a small LED light on the front that shows you when they’re powered on and indicates battery life. The earbuds are very lightweight and comfortable to wear, even for long periods of time.

John Rylands Library


Offline Languages Available


The Timekettle M3 translator earbuds offer a great selection of languages, with 40 different languages and 93 different accents. However, they only offer 8 of those languages offline.

So if you’re planning on using the earbuds in a country where you don’t have reliable internet access, you’ll need to make sure that your chosen language is one of the 8 that can be used offline.

The offline translation languages available are:


  • From Chinese to English, Japanese, French, Spanish, Korean, Russian, and German,
  • From English to Japanese, French, Spanish, Korean, Chinese, Russian, and German


40 Online Languages Available


The M3 supports 40 different languages, with 93 different accents. So no matter where you’re traveling, you’ll be able to communicate with ease.

Languages available:

Arabic / Bulgarian / Cantonese / Catalan / Chinese / Croatian / Czech / Danish / Dutch / English / Finnish / Fillipino / French / German / Greek / Hebrew / Hindi / Hungarian / Icelandic / Indonesian / Italian /Japanese / Korean /Malay / Norwegian / Polish / Portuguese / Romanian / Russian / Slovak / Slovenian / Spanish / Swedish / Tamil / Telugu / Thai / Turkish / Ukrainian / Urdu / Vietnamese

Back of box instructions


Battery Life


The Timekettle M3 translation earbuds have impressive battery life. I was able to use them for about 7 hours on a single charge. The charging case also provides roughly up to 24 hours of additional charge, so you can rest assured you will get plenty of use before needing to plug it in. The earbuds themselves take about 1.5 hours to charge.


How is the sound


The Timekettle M3 Translation 3in1 Earbuds sound great. They offer a clear, well-balanced sound that is perfect for music listening and phone calls, even in noisy environments. The earbuds also have a built-in noise-canceling feature that helps to reduce background noise so you can focus on your music or conversation.

Open case


Benefits of the translation feature


These earbuds offer a number of great features, including Bluetooth 5.2 technology for easy connectivity, touch control for easy operation, and impressive 7-8 hour battery life. They also come with a charging case that offers an additional 24 hours of battery life, so you can keep them going all day long.

A 0.5-second translation speed will ensure that you’ll never miss a beat while communicating. And if you’re worried about their ability to stay in your ears, don’t be – the M3 comes with three different sizes of ear tips so you can find the perfect fit.

Timekettle states the earbuds are waterproof, but we have not had a chance to test this functionality.

side box
side 2 box


Pro’s 


  • Lightweight, compact, portable
  • Fast connection via Bluetooth
  • Easy setup on your smartphone
  • Great battery life
  • 3 different size silicone earbuds
  • Good selection of languages – 40 languages, 93 different accents
  • 3 translation modes – Touch Mode: Listen mode, Speaker mode
  • Works well outdoors with environmental noises
  • Great all in one- Music, Phone calls, and translator


Con’s


  • Always needs a connection to a phone
  • Minimal choice of offline languages
  • Cannot manage with normal conversation speed – need to talk slower
  • Can be a bit expensive
The Royal Exchange
translate


Using the touch control


The touch control on the Timekettle M3 translator earbuds is really easy to use. Simply tap the earbud to answer or end a call, and tap to play or pause your music.

You can also double-tap the right earbud to skip to the next track and double-tap to go back to the previous track. The touch control is also used to activate the translator function. To do this, simply tap and hold the earbud until you hear a beep, then release it to start translating.

You can also check your translation history and use the Timekettle with text translation, just select the languages you require and start typing everything you need.

History menu
Text translation menu


The fish card

A fish card is used to redeem and download offline languages. You can use the fish card to download up to 13 offline languages.

The functions of the offline and online versions are exactly the same. The difference between them is that there’s a 30 coins fish card in the offline box, which you can redeem and download 6 offline languages.

Fish card 30


What do the M3 earbuds cost? 


The Timekettle M3 is available for purchase on the Timekettle website. They are priced at $119.99 USD for the online pack.

If you are looking for the offline package you are looking at paying $149.99 USD, if you choose to go with the online-only pack and change your mind later, you can buy the X30 fish card for an additional $60 USD.

The Timekettle M3 translator earbuds are a bit on the expensive side, but they offer a lot of features and have great build quality. If you’re looking for a translator earbud that can do it all, then the Timekettle M3 is definitely worth the investment.

Full timekettle set
Open case

Did I enjoy using the M3 Timekettle Translation earbuds?


I was impressed with the translating performance of the Timekettle M3 translator earbuds. I used the earbuds during my 3-month trip to Portugal to visit my husband’s family and the earbuds were able to accurately translate my words almost immediately.

The earbuds also did a good job of filtering out background noise so that the person I was speaking to could understand me clearly.

The only downfall of the translation is that you and the other person need to speak slower than the normal conversation in order to get better accuracy and you can only have one Bluetooth device connected at a time, I am unsure if this is an Andriod issue (as I have a Samsung phone) or with the Timekettle earbuds, as I often got disconnected from my earbuds, in saying that with one click of a button, they instantly re-connected without any issues or delay.

I had the translation set to Portuguese-English, and although the translation was good while speaking slowly during a one-on-one conversation if people talked at their normal pace one-on-one or in listening mode, the earbuds had trouble translating correctly.

Can they be improved? yes, but only slightly.

Conclusion- My final Verdict! 


The Timekettle M3 Translation 3-in-1 Earbuds are a great option for anyone in need of a real-time translation solution. They offer clear, well-balanced sound and impressive 8-hour battery life. Their built-in translation feature is helpful for international travelers or anyone who needs to communicate in multiple languages on a regular basis, keep in mind you need to talk a bit slower in order for the earbuds to fully understand.

However, there are a few things to keep in mind if you are thinking about purchasing the M3 translation earbuds – the earbuds can only translate the spoken language chosen, they require a connection to a phone via a Bluetooth-enabled device, and they are only compatible with the 40 most popular languages unless you buy the offline package to download some or all of the 8 offline languages, otherwise you will need to have good access to mobile internet data or WIFI, keeping in mind the offline language selections is minimal.

Overall, the Timekettle M3 Translation 3-in-1 Earbuds are a good choice for anyone in need of a pair of translation earbuds, so If you’re looking for a quality pair of earbuds to take your music listening, phone calls, or language learning to the next level, the Timekettle M3 Translation 3-in-1 Earbuds are a great option.

Timekettle recently released a new handheld translator device  The Fluentalk T1 in November 2022, which I have been lucky to use, and I am very happy with its accuracy, it is not earbuds, but bonus it doesn’t need to be connected to your phone, take a read my review on the Fluentalk T1 now.

Timekettle buy now

Would I recommend the Timekettle M3 Earbuds?


YES, I would recommend the M3 earbuds. However with some conditions and a few things to keep in mind which I listed above. If you can work with those, then I believe you’ll be very happy with your purchase, just as I am with mine.

How to Plan the best Trip: Easy Tips for Beginners

How to Plan the best Trip: Easy Tips for Beginners

Are you planning a trip but aren’t sure where to start? Don’t worry, you’re not alone! Planning a trip can seem daunting, but it doesn’t have to be. In this blog post, we will outline easy steps that will help you plan the perfect trip. Whether you’re a beginner or an experienced traveler, these tips will come in handy. So what are you waiting for? Start planning your next adventure today!

***This post contains affiliate links. If you make a purchase through clicking the link, we may earn a small commission at no additional cost to you.***

Decide where you want to go

The first step in planning the perfect trip is to decide where you want to go. Do some research and decide on a destination that appeals to you, making this decision is going to set the tone to make the whole process much easier.

Start brainstorming ideas to decide what type of holiday you want.

  • what you want to do there.
  • Are you interested in sightseeing, hiking, or shopping?
  • Are you looking for a relaxing beach vacation? A cultural city break? An adventurous hike?
  • Are you wanting to go for a summer or winter getaway?
  • Are you traveling on a budget or more luxurious holiday

Once you have an idea of what you want to do, start looking for activities that fit your interests.


When you want to go and for how long

Choose when you want to go and how long. This will depend on your budget and a number of other factors, including;

  • Your schedule
  • The weather at your chosen destination
  • If it is peak tourist season.

If you’re flexible with your dates, you may be able to get better deals on flights and accommodation but before being able to work out the next step, you need to break down exactly how long and when you want to go on your holiday to determine what you will need to be budgeting for.


How much will the vacation cost

How much will you need for your vacation? This will depend on the type of activities that interest you and how many people are going with you or if you are traveling solo, how long you are going for and also comes down to the destination you choose, for example going to somewhere in Europe is going to be more expensive than going to Thailand or Bali for food, accommodation, and activities.

With the following steps come breaking down where you are going, what things you want to see and do, and where you will stay, which will help you work out a rough estimate of how much money you will need to enjoy your holiday without the financial stress.

There are a few ways you can save money on these expenses with a little research. For example.

Skyscanner – you can use a flight search engine to compare prices

Booking.com – To look for accommodation with free cancellation in case your plans change

HostelWorld for people traveling more on a budget or looking to connect with fellow travelers.

Keep in mind additional costs that may be involved when deciding on a location and this may help you in making a decision depending on your budget to where you choose to go. Things like.

Visas – Certain Countries require you to have visas, be sure to check ProjectVisa prior to booking to ensure you have the correct visas.

Generally, there is a cost associated with a visa, and ensure your passport is valid for at least 6 months from your return date.

Vaccines – to find out if you will require any travel vaccines check out the CDC website, it will tell you the recommended vaccines you need as well as health risks. 

Booking.com

Research and book flights

Now that you know where you want to go and have an idea of the type of trip you would like to take, it’s time to start looking at flights. There are a few ways that you can go about this depending on your budget and preferences.

You can use a search engine like Skyscanner or Google Flights to compare prices and find the best deals. Another option is to sign up for alerts through Skyscanner or with the airline’s website directly so that you can be notified when there are sales or special offers.

Once you’ve found a flight that works for you, in price, in dates, and in time, it’s time to book! Be sure to double-check all of the details before confirming your reservation.

    Research and book Accommodation

    Depending on how long you intend to travel for, you may or may not want to book your whole trip, I always book my first night on arrival as it gives me a peace of mind I have somewhere to go after I arrive from a flight, the last thing you want to be doing to searching for accommodation especially if you arrive late at night.

    When searching for accommodation, it’s important to keep a few things in mind.

    • First, consider your budget and what type of accommodation you’re looking for. Are you looking for a hotel, hostel, or Airbnb?
    • Second, think about the location. Do you want to be in the heart of the city or a little outside of the hustle and bustle?
    • Third, consider what amenities are important to you. Do you need Wi-Fi, a pool, or a fitness center?

    Finally, be sure to read reviews before booking. This will help you get an idea of what to expect from your stay, keeping in mind with reviews that there will always be good and bad reviews for everything as people always have differing expectations.

    Now that you’ve considered all of these factors, it’s time to start searching for accommodation.

    A great way to find deals is to search on websites like Booking.com or Hostelworld. You can also check out Airbnb for unique accommodations.

    Once you’ve found a place that you like, don’t forget to read the reviews and check out the photos. Then, go ahead and book your stay!

    Research things to do at the destination


    Once your flights and accommodation are booked, it’s time to start thinking about what you want to do on your trip. If you’re visiting a new city, research the must-see sights and create a list of activities you want to do. This will help you map out your budget and how to spend your days without missing out on activities.

    Check out attractions and activities you want to do and the costs involved, depending on your mode of transport while you are there and getting around, tours may be something of interest but generally cost more.

    You can either book in advance online for activities or sometimes depending on the destination, it can be cheaper to book while there or visit the local tourist information center and in their local booklets, they often have coupon vouchers for discounts.

    To gather more ideas on what to see and do in your destination

    • Check out travel blogs/ Goggle and guidebooks to get ideas for your trip.
    • Look at Pinterest for location guides and ideas
    • Look at social media for peoples feedback or ideas, and ask family and friends if they have been.
    • Create a packing list of everything you’ll need for your trip.


    Be Covered 


    Before you start packing your bags and planning your itinerary, be sure to purchase travel insurance. This is an important step that many travelers overlook.

    Travel insurance will protect you in case of cancellations, lost baggage, medical emergencies, and more. Trust us, you don’t want to be caught without it.

    Unforeseen things often happen on holidays, from breaking your camera, losing your phone, needing medical assistance, or simply missing a flight, you do not want to be adding the extra stress of costs needed to help you in a time of need.

    I have had a few mishaps on my travels, from breaking my arm snowboarding in Canada, being pick-pocketed in London, to having my bag stolen and my belongings including my camera gone and missing a flight to Ireland without having travel insurance my costs for my holiday would have been huge and let’s be honest, I would have come back or even started my holidays in a bad way and not have enjoyed myself.

    Travel insurance saves you from overwhelming stress!

    Plan your Itinerary

    Along with researching what you can do on your holiday, one of the most important aspects of trip planning is creating a realistic itinerary. This will help you make the most of your time at your destination and avoid feeling overwhelmed or like you’re missing out on activities.

    When planning your itinerary, be sure to allow yourself plenty of time for each activity. To make things easier, we recommend using a day-by-day format. This will help you stay organized and ensure that you don’t miss anything.

    Start by creating a list of all the activities you want to do. Then, group them by day and start filling in your itinerary, try and group the things together that at located close by, this allows you to see more things than spending more time traveling from one activity to another.

    Also, be sure to leave some free time in your itinerary for exploring and spontaneous activities. This is often when we have the most fun and create lasting memories.


    Pack your bags for an adventure

    One of the best ways to travel is by packing lightly. This will save you money on baggage fees and make it easier to get around. When packing, be sure to only bring items that you will need.

    This may seem obvious, but it’s easy to pack too much! A good rule of thumb is to pack clothes that can be mixed and matched. This way, you’ll have more outfit options with fewer items of clothing.

    Another way to save space is to roll your clothes instead of folding them. This will help you fit more into your suitcase. Finally, be sure to wear your heaviest items on the plane. This includes shoes, jackets, and any other heavy items.

    Now that you have all of the logistical details sorted out, it’s time to start packing! Make a list of everything you will need and pack accordingly to help you with this, check out my what to pack post. Don’t forget to bring your passport, tickets, and other important documents with you. And finally, don’t forget to enjoy yourself!


    If you are needing some help and tips to save money for your trip be sure to read my blog post on Tips to save money for your next trip.

    Relax and take in the sights, sounds, and smells of your destination. If you’re lucky enough to be traveling with friends or family, make sure you spend some quality time together enjoying each other’s company.

    Have you tried any of these methods? What are your favorite tips for planning a great trip? Drop me a comment and let me know!